
- 嵌件成型稳定性方面的工程挑战
1. 产品概述
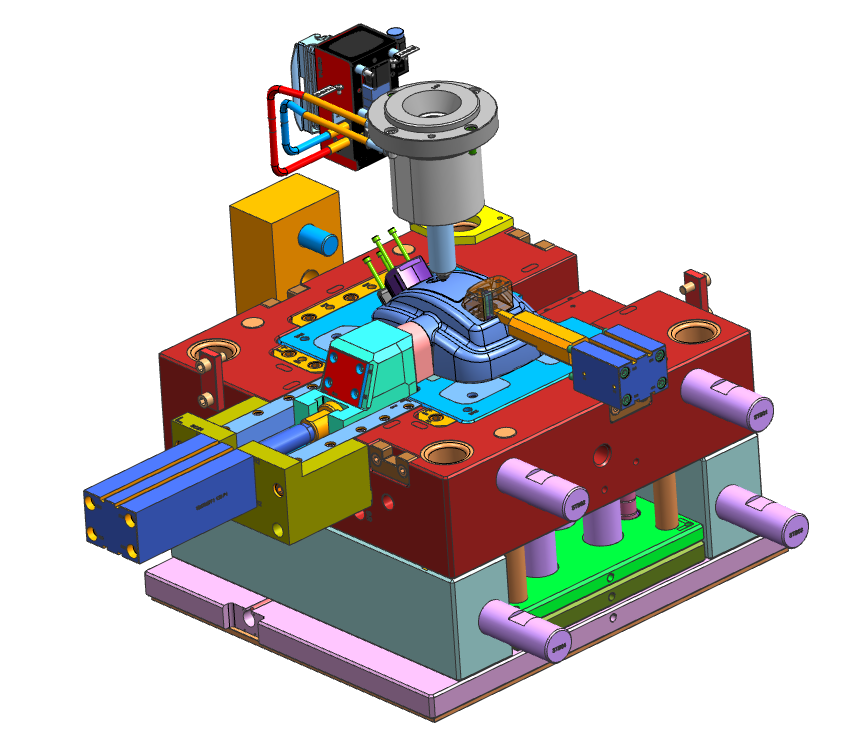
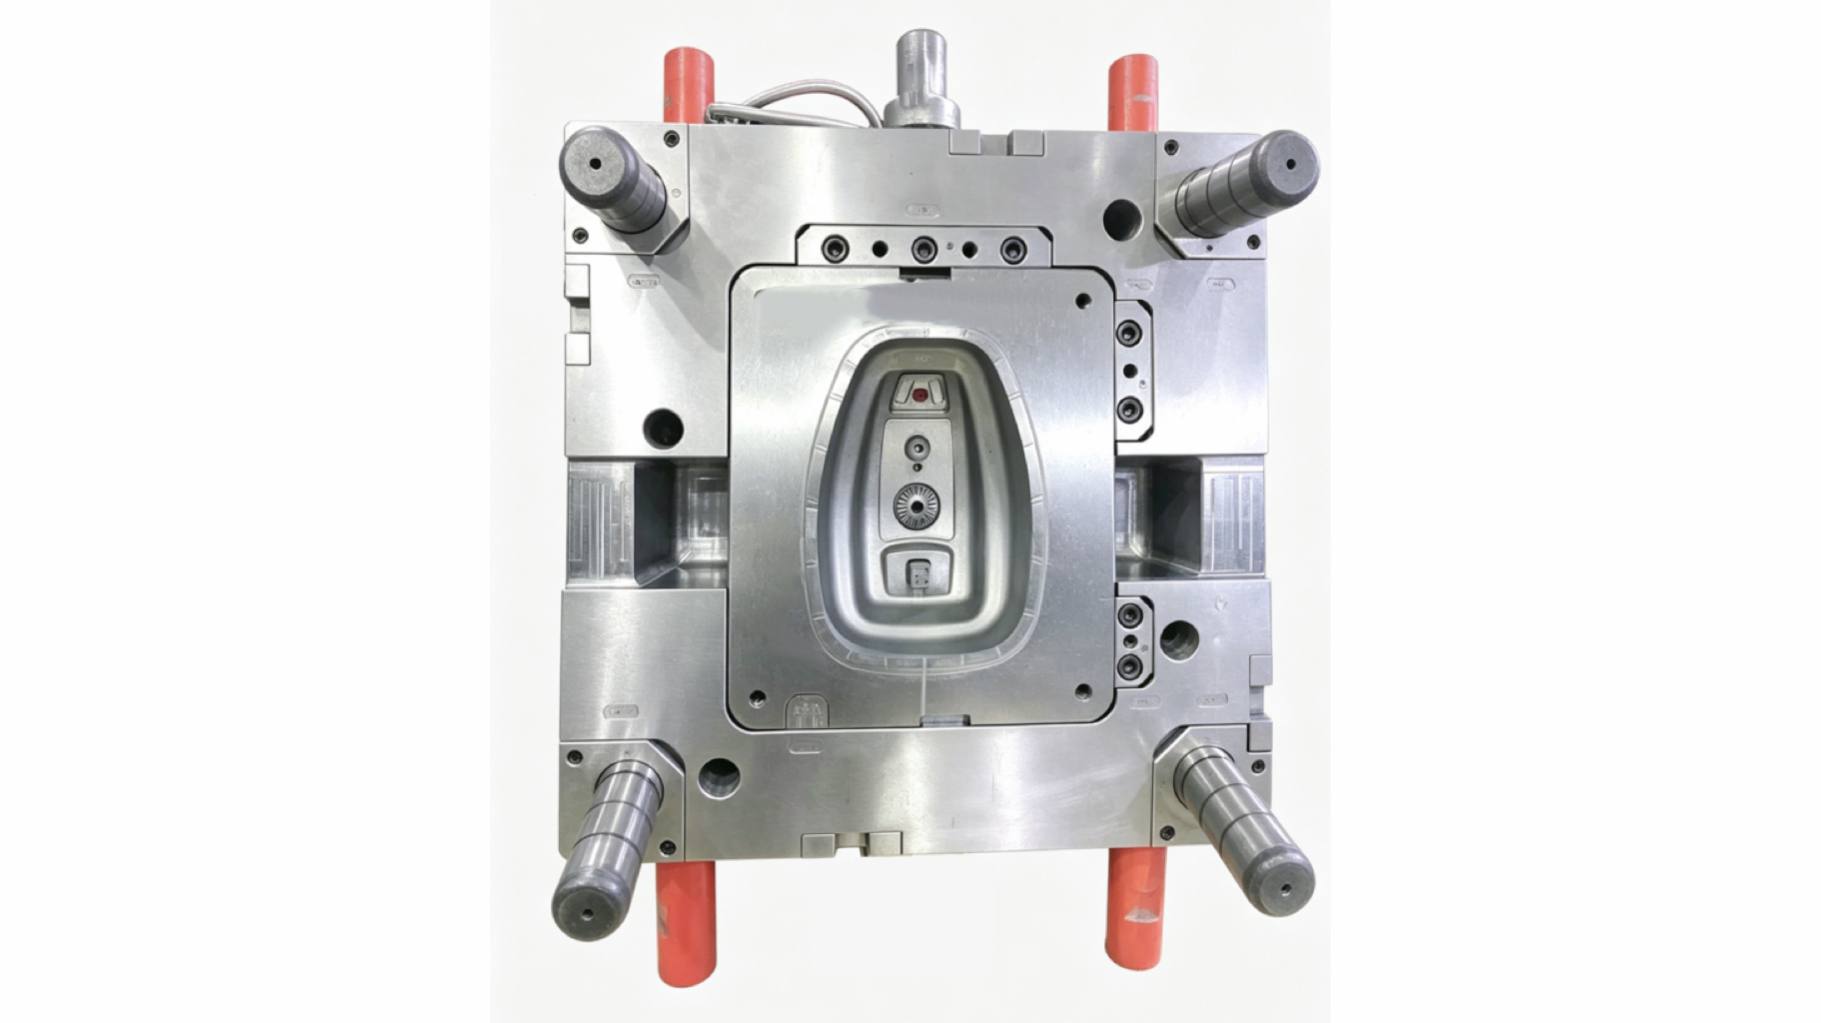
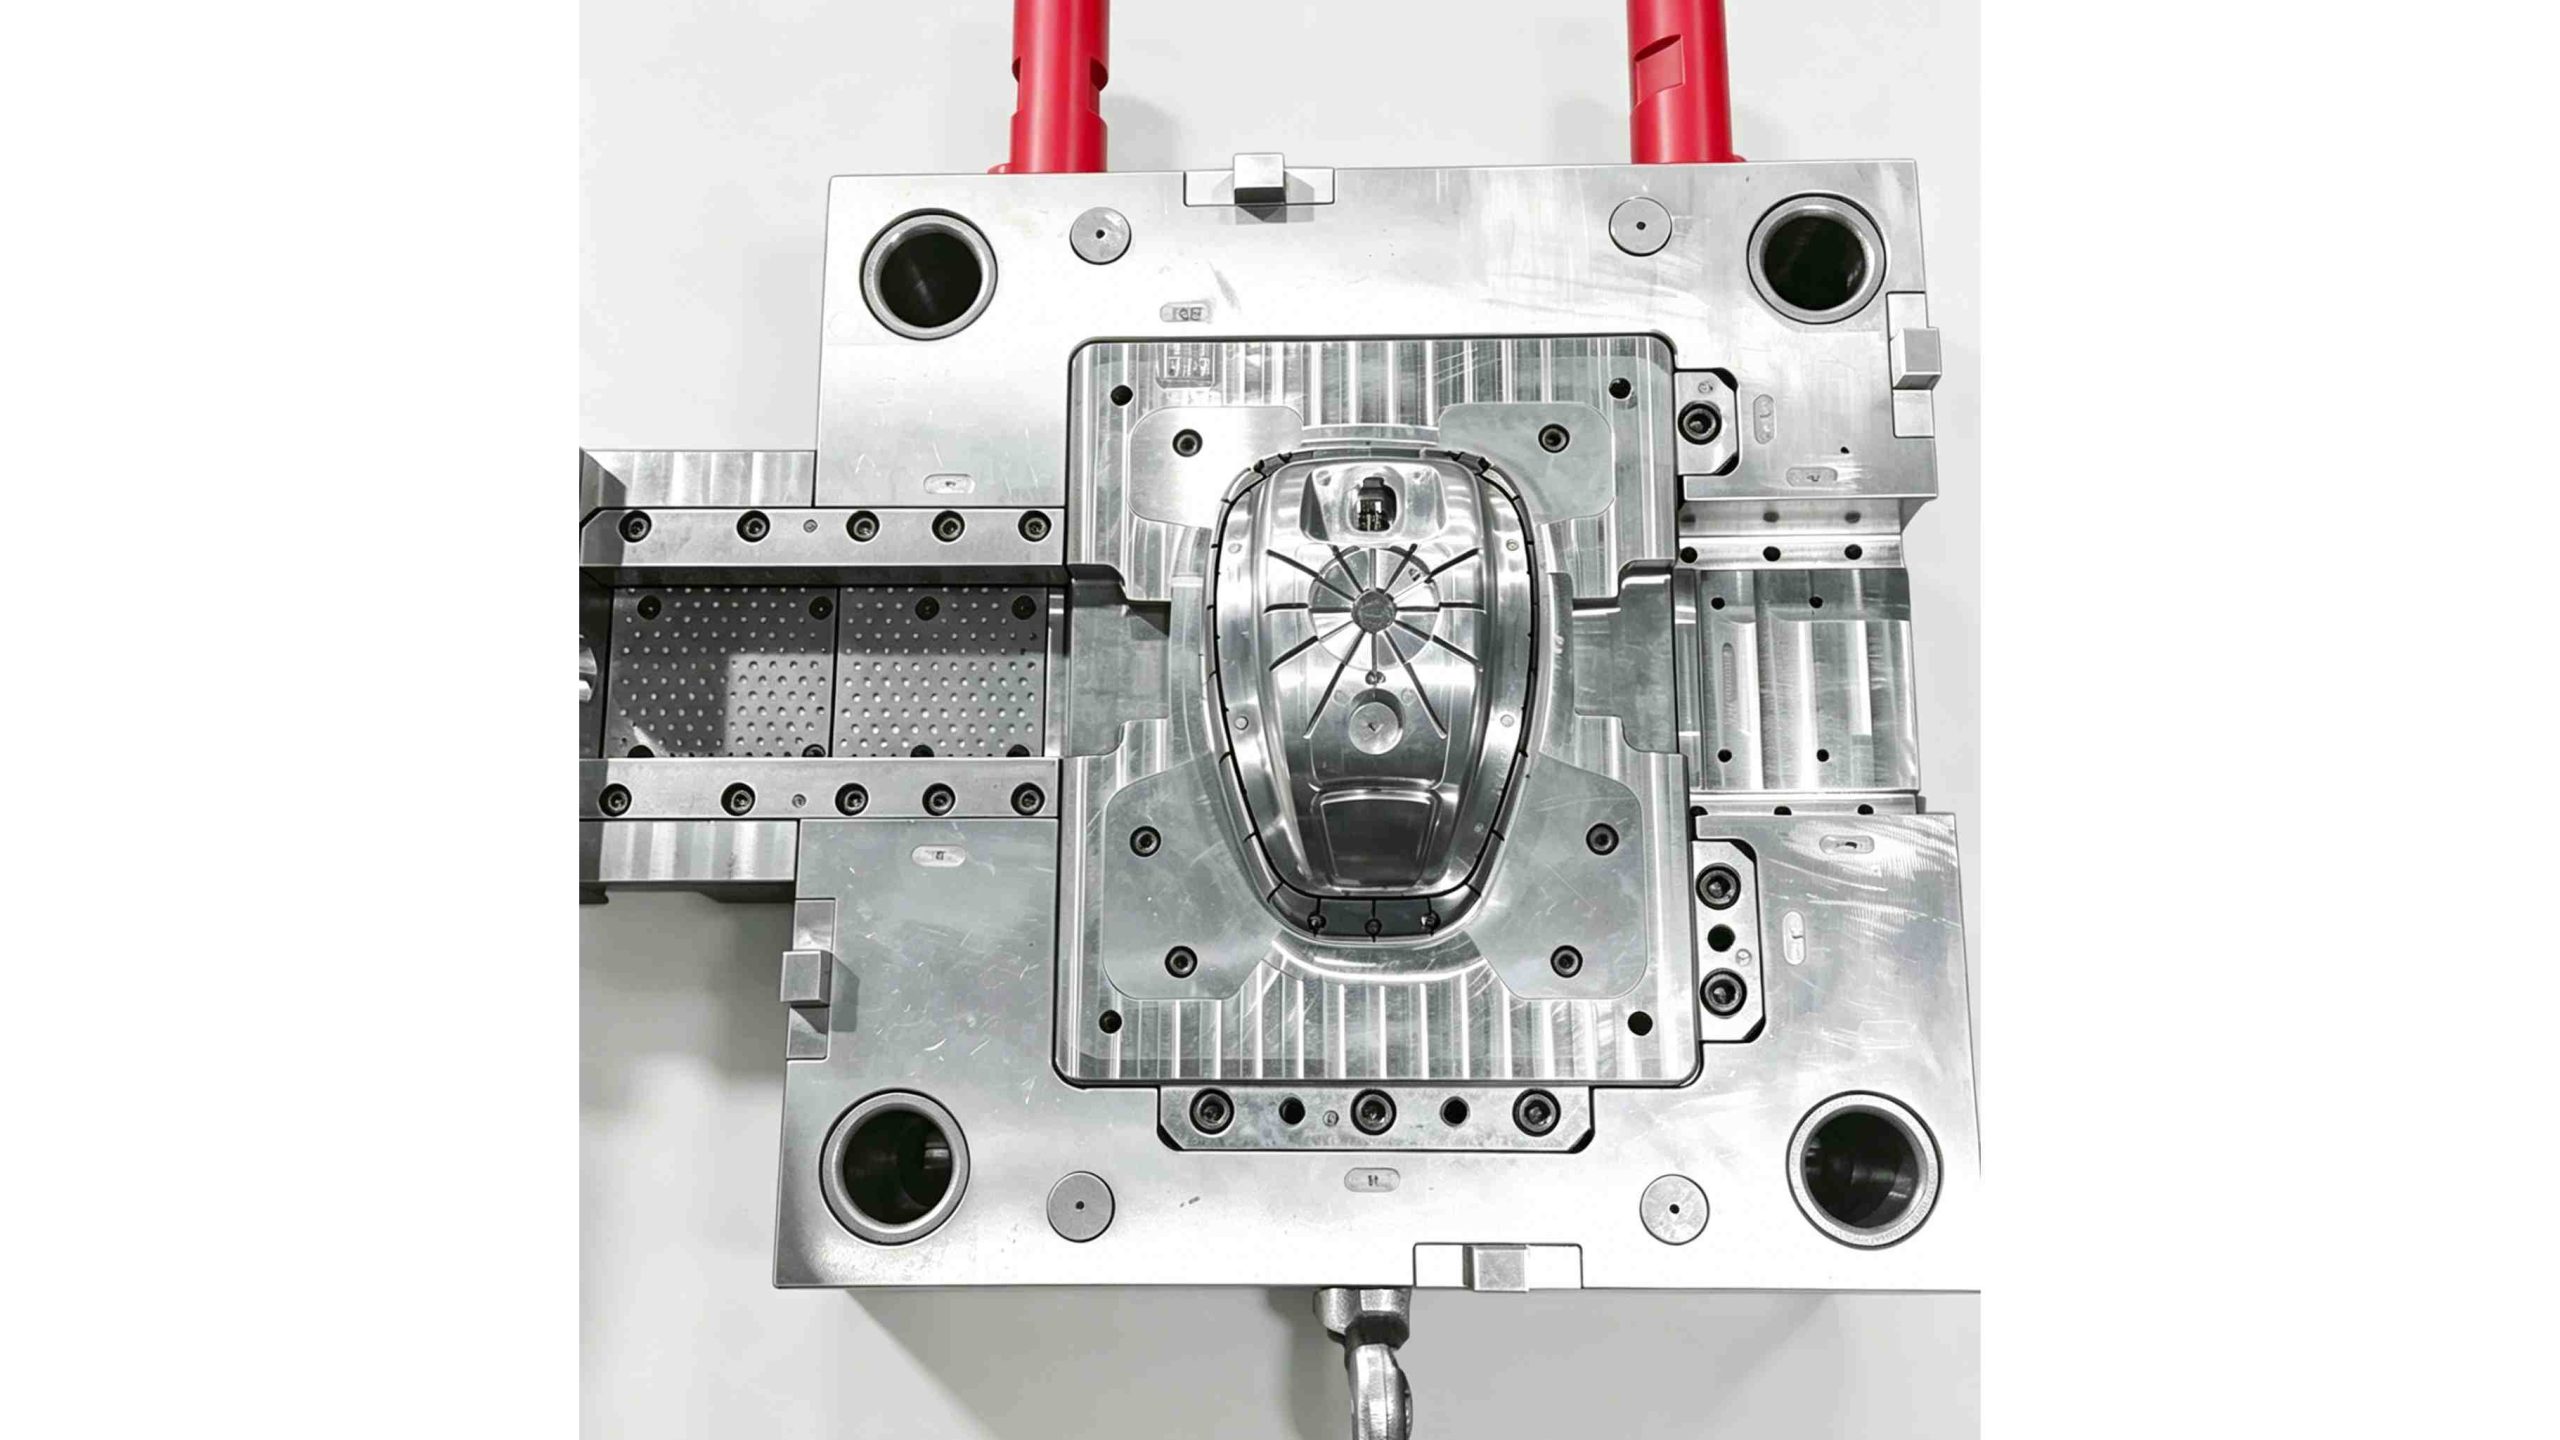
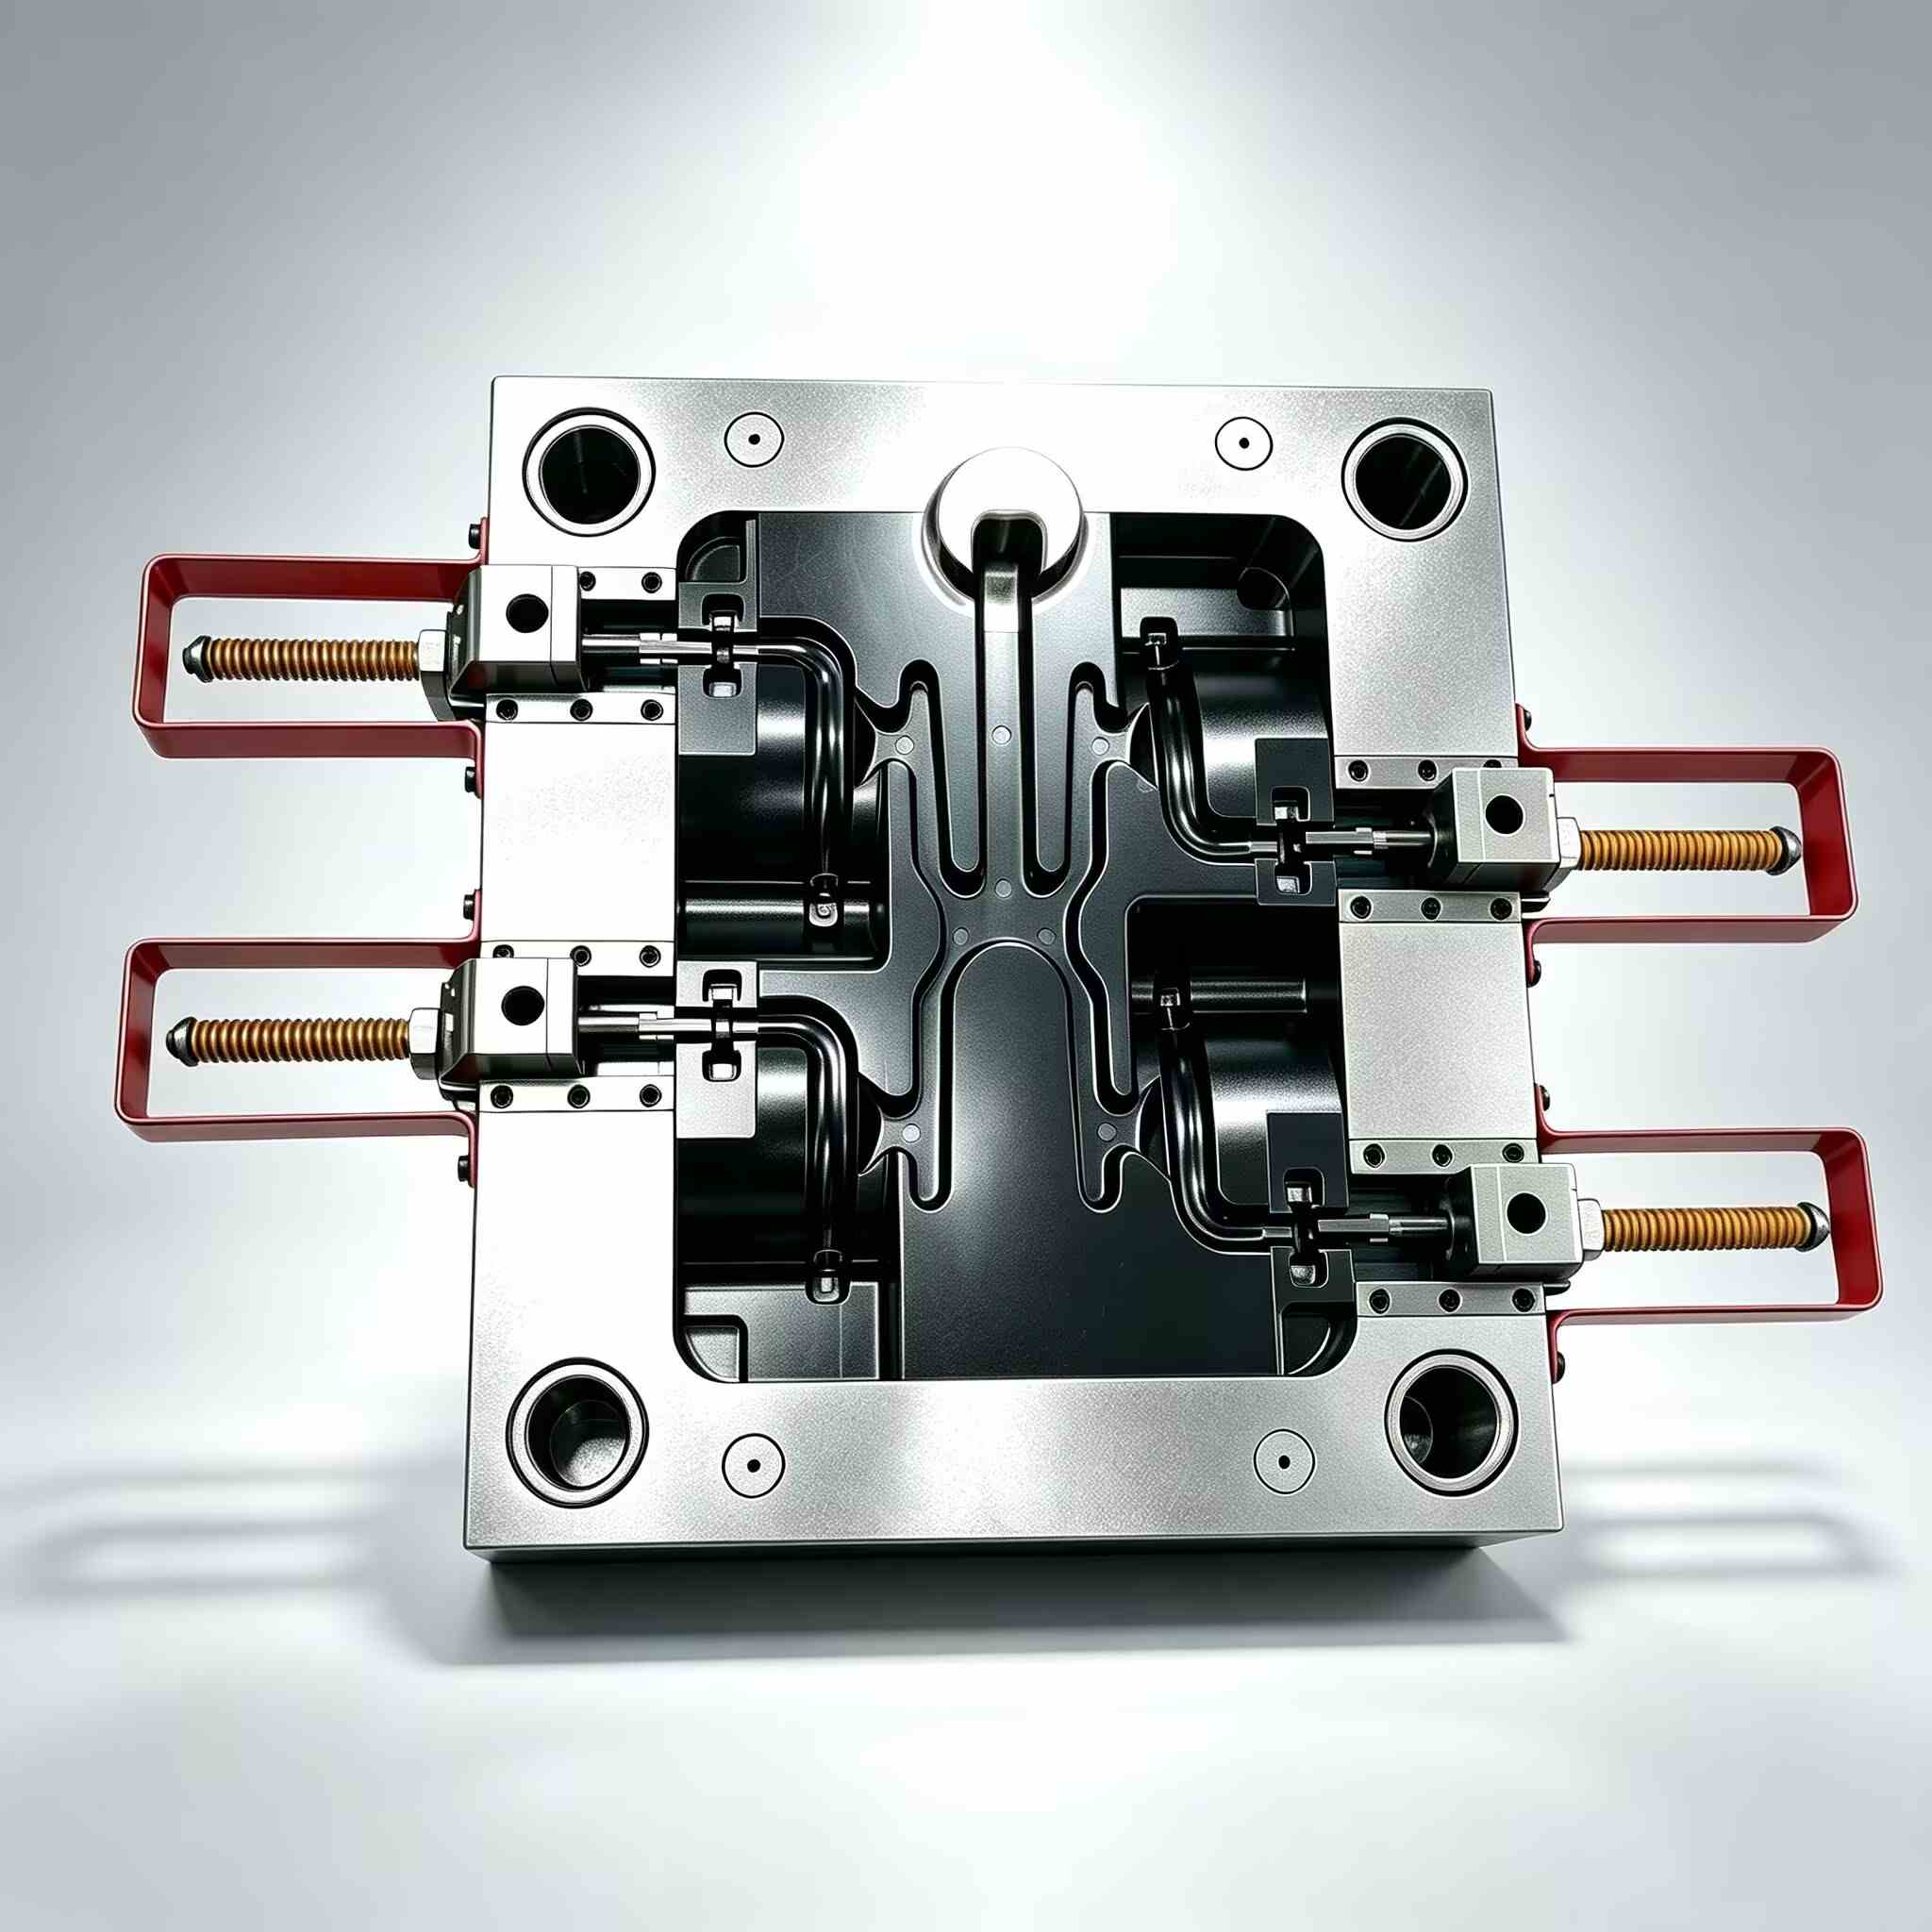
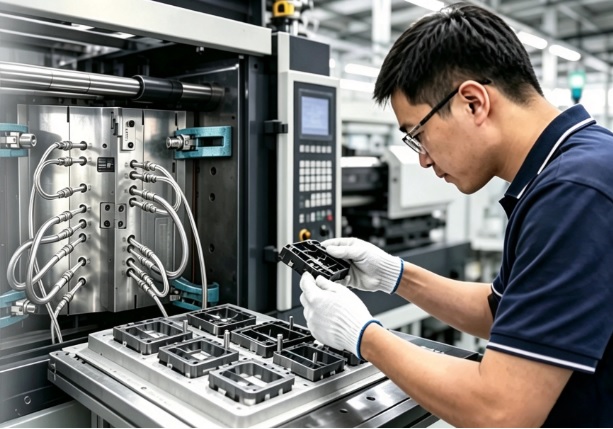
嵌件注塑模具用于生产带有金属或其他非塑料部件的塑料零件,这些部件在注塑过程中直接注塑到零件内部。嵌件(通常是黄铜螺纹衬套、钢销、铜质电触点或冲压金属支架)在每次注塑前被放入模腔中,然后熔融塑料流过嵌件并凝固,将其永久包裹。这种技术适用于塑料零件需要耐用螺纹连接点、需要导电层穿过壳体壁,或需要金属结构元件加固塑料部件的情况。在XINKEY MOULD,嵌件模具工程主要关注三个方面:嵌件固定,确保金属部件在注塑压力下不会发生移位或倾斜;热管理,防止冷嵌件导致塑料过早冻结或出现缩痕;以及装载人体工程学设计,使操作员或自动化系统能够快速放置嵌件并降低错误率。
2. 本产品可以解决哪些问题?
注射压力下的插入移位
黄铜嵌件安装在定位销上时看起来很牢固,但在型腔填充之前,熔体前沿可能会将其推离原位 0.1-0.3 毫米,导致嵌件偏离中心,无法与其配套螺钉啮合。XINKEY MOULD 使用带有真空辅助保持通道的硬化定位销,对于关键应用,还采用弹簧加载的固定指,在熔体前沿到达嵌件之前将其牢牢固定。
冷嵌件缺陷:凹陷痕迹和过早冻结
当室温金属接触到温度超过 200°C 的熔融塑料时,塑料会在嵌件表面瞬间结皮,形成一层薄弱的边界层。同时,它还会吸收周围熔体的热量,导致另一侧出现缩痕。我们的模具配备了嵌件预热站和热模拟装置,以确保嵌件周围的塑料在型腔完全填充之前始终保持在不流动温度以上。
闪蒸至螺纹嵌件区域
注塑成型中最昂贵的废料:螺纹处有塑料飞边的黄铜螺纹嵌件。嵌件必须与型腔钢材在螺纹区域紧密贴合——任何缝隙都会导致塑料流入。我们设计的嵌件安装面具有可控的过盈量,并在螺纹入口周围使用硬化钢封堵,经三坐标测量机验证,平面度精度可达 0.01 毫米以内。
3. 典型应用
带螺纹安装点的电子外壳
用于工业传感器、控制箱和汽车 ECU 的塑料外壳,其中黄铜或不锈钢螺纹嵌件提供耐用的安装点,可经受反复的螺丝组装和拆卸,而不会损坏塑料螺纹。
连接器和端子包覆成型
这种电气连接器采用铜或黄铜引脚和端子,并以包覆成型工艺封装在 PA66 或 PBT 外壳中,形成密封且应力消除的连接点。引脚周围的插针固定和毛刺控制至关重要——连接器表面哪怕只有一根松散的塑料毛刺都可能导致电气故障。
金属加固结构支架
汽车支架、家具五金件和电器安装板,其中冲压钢或铝支架用塑料包覆成型,将金属的强度与注塑成型的设计自由度和重量优势结合起来。
塑料外壳中的螺纹衬套
黄铜或不锈钢螺纹嵌件包覆成型于泵壳、阀体和工业设备外壳中。金属螺纹可提供塑料螺纹无法实现的可靠扭矩保持力,尤其适用于需要反复组装/拆卸的应用。
4. 规格表
| 物品 | 细节 |
| 模具类型 | 注塑模具 |
| 插入类型 | 黄铜螺纹嵌件、钢销/衬套、铜端子、冲压支架、陶瓷嵌件 |
| 插入加载 | 手动、半自动托盘送料或机器人取放(按体积计) |
| 保留方法 | 定位销、真空通道、弹簧加载指(根据插件设计) |
| 插入定位 | 标准尺寸为±0.03mm;精密连接器尺寸为±0.02mm |
| 预热 | 适用于需要散热管理的插件 |
| 传感器验证 | 腔体加载传感器可防止模具在没有嵌件的情况下闭合 |
| 模具钢 | H13/S136;D2 位于插入件座和关闭面上 |
| 典型零件材料 | PA6、PA66 GF30、PBT、PC、ABS、PP(经化学键合处理) |
| 设计支持 | DFM、嵌件保留分析、热模拟、模流 |
| 试用支持 | T1取样、插件配合验证、拉拔力测试、横截面分析 |
5. 项目流程与质量控制
第一阶段:插入设计评审和面向制造的设计 (DFM)。
行动:审核嵌件图纸和零件CAD文件。检查嵌件几何形状是否适合成型:足够的安装面、无可能导致嵌件卡在成型件中的倒扣、热膨胀系数。如有需要,建议对嵌件进行修改。
质量控制重点:DFM报告:插件座圈分析、固定方式选择、热影响评估、每个循环的加载时间估算。
第二阶段:模具设计及保持力工程
行动:3D模具设计:嵌件定位系统(销钉、真空或指状物)、嵌件入口周围的封闭面、避开嵌件位置的冷却布局、装载通道的人体工程学设计。
质量控制重点:保持力计算:保持力必须至少是注射压力的2倍。截止面平整度规格。装料间隙验证。
第三阶段:精密加工和嵌件配合
行动:采用数控机床加工带嵌件座面的型腔。截止面经精密研磨。定位销经硬化处理并研磨至直径公差。
质量控制重点:对每个型腔进行嵌件配合检查:嵌件的安装位置必须在设计位置的 0.01mm 以内。使用三坐标测量机验证截止面的平面度。检查定位销的直径。
第四阶段:组装和负载测试
行动:完整组装。手动插件加载测试:测量每个型腔的加载时间,验证插件放置时传感器是否激活,测试插件的干式加载循环。
质量控制重点:加载人体工程学报告。对每个腔体进行传感器信号验证。干循环测试:插入件放置后进行 50 次循环,未出现误报传感器触发。
第五阶段:T1试验
行动:使用嵌件进行试验。优化注塑参数:嵌件预热设置、注塑速度、保压压力、冷却时间。取样件进行嵌件固定和飞边检查。
质量控制重点:通过X射线或横截面分析对首件样品进行嵌件位置验证。对螺纹嵌件进行扭矩失效试验。检查嵌件入口周围的飞边。提供完整的尺寸报告。
第六阶段:最终检验和交付
行动:最后清洗、防锈、包装(含插入式装载指南)、传感器接线图和备用定位销组。
质量控制重点:完整文档:试验报告、插入件保留测试数据、工艺参数、装填指南和维护说明。
6. 为什么选择新基模具
插入物固定:我们的工程重点
我们并不认为仅靠定位销就能在高压熔体流动下固定嵌件。每个嵌件模具项目都会进行保持力计算,并在必要时增加真空通道或弹簧式机械固定装置。这种工程方法可以降低因嵌件移位造成的废品率——嵌件成型中最昂贵的废料。
内置热补偿
金属温度25°C与塑料温度200°C以上不匹配是造成嵌件周围出现缩痕和结合不牢固的根本原因。我们的模具设计包括预热建议、嵌件区域周围的热模拟以及避免嵌件附近出现冷点的冷却布局。
生产安全传感器验证
模具在没有嵌件的情况下闭合会损坏模具和压力机。我们的嵌件模具内置型腔传感器,可在模具闭合前确认每个嵌件都已安装到位。传感器逻辑已记录在案并完成接线,可轻松集成到您压力机的控制系统中。
灵活装载,满足您的容量需求
无论您是采用手动装片方式年生产 5,000 个零件,还是采用机器人装片方式年生产 500,000 个零件,我们都会根据您的实际生产情况,设计符合人体工程学的模具和自动化接口。手动模具配备快速装片站;自动化模具则采用标准化的取放接口。
7. 常见问题解答
Q1:嵌件注塑模具可以包覆成型哪些类型的嵌件?
常用嵌件包括黄铜螺纹衬套、钢制定位销和衬套、铜或黄铜电气端子、冲压金属支架和陶瓷元件。嵌件的几何形状必须能够使其牢固地固定在腔体内并被塑料封装,且不会产生薄弱点或应力集中。
Q2:注塑件中嵌件的定位精度如何?
标准插片定位公差为±0.03mm。对于插片位置会影响电触点对准的精密连接器,我们通过改进的保持设计和工艺控制,实现了±0.02mm的定位公差。该公差通过三坐标测量机或X射线测量在T1样品上进行验证。
Q3:注塑成型前是否需要预热嵌件?
这取决于嵌件的材料和尺寸、模塑塑料的种类以及零件的几何形状。大型金属嵌件或高温工程树脂嵌件通常需要预热,以避免塑料过早冻结和出现缩痕。我们在可制造性设计 (DFM) 过程中会对此进行评估,并在必要时提供预热建议。
Q4:单个模具能否生产带有多个不同镶件的零件?
是的,只要每次注塑的装料时间在您的循环时间目标范围内即可。一个模具可以在一次注塑中容纳多种类型的嵌件——例如,在同一个零件中同时安装黄铜螺纹衬套和钢制定位销。每个嵌件工位都有其独立的保持装置和传感器验证装置。
Q5:获取嵌件模具报价时,我应该提供哪些信息?
塑料零件的三维CAD模型(STEP/IGES格式)、每种嵌件类型的二维图纸(需包含材料规格,例如黄铜C36000)、目标塑料材料、年产量以及首选的装配方式。如果嵌件并非您自行设计,我们还需要嵌件供应商的图纸和公差规格。
产品
最新消息
- 23rd 10 月 2026
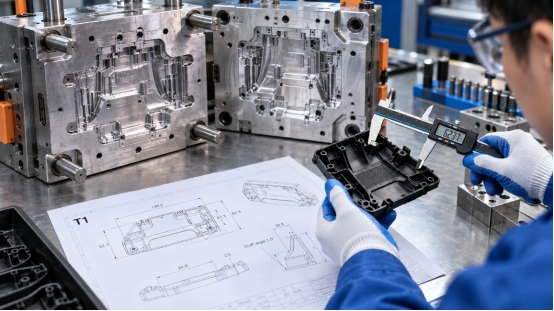
Low-Volume Injection Molding: On-Demand Production & Fast Tooling
Why does Low-Volume Injection Molding Fit Uncertain Demand?
Low-volume injection molding gives you a production path when demand moves. You can make saleable parts, validate a design, and learn from field use before committing to a large steel tool.
On-demand production lets you buy smaller releases, keeping cash and warehouse space tied to real orders. Aluminum tooling can bridge a prototype and stable production. The choice depends on geometry, resin, quantity, and change cost.
When does On-Demand Production Make Sense?
Use it for a new product with uncertain demand, irregular replacement orders, or planned design revisions. It suits medical, laboratory, smart hardware, and industrial products that need hundreds or a few thousand validated parts. The run can expose fit, assembly, and surface issues while tool changes remain manageable.
What does Fast Tooling Change?
Fast tooling compresses the time between a frozen CAD file and useful parts. A practical route combines a rapid tooling review, mold design, CNC machining, trial molding, and a T1 check. The goal is a controlled learning cycle. Aluminum tooling can suit early production and provide data for a later hardened mold.
How does the Process Control Tooling and Production Risk?
Low-volume injection molding production still needs production-grade thinking. A short run can hide a poor gate or unstable cooling layout, then repeat the problem as demand rises. Review the part, mold, and press together so each decision has a measurable reason.
What Happens in an Injection Molding DFM Review?
An injection molding DFM review checks wall thickness, draft, parting line, gate, venting, ejection, shrinkage, and press tonnage. Mold-flow simulation can show filling balance, air traps, weld lines, and cooling differences before steel is cut. This mold design for manufacturability step also flags undercuts that may need sliders, lifters, or inserts. Marked-up CAD views show the cost and schedule effect of each change.
How are Tooling and Samples Verified?
After machining, trial molding checks the cavity, runner, cooling, and ejection systems. Record T0 findings, correct root causes, and review T1 parts against the drawing. Ask for the inspection method, resin lot, and sample process conditions.
Which Quality Features Need a CTQ Plan?
Mark CTQ features where a dimensional shift affects sealing, fit, force, optics, or electrical safety. Link each CTQ to a gauge or CMM check, sampling frequency, and limit. This keeps a low-volume trial run useful for repeat orders and gives evidence beyond a visual sample.
Which Part Design Choices Affect Cost and Speed?
Part geometry sets much of your tooling cost before a purchase order. Design edits can shorten injection molding lead time, reduce secondary work, and simplify plastic injection mold maintenance.
How Much Draft Angle Do You Need?
Add a draft angle to faces that pull along the opening direction. Textured faces and deep ribs usually need more draft than smooth faces. Review the parting line with the ejection plan so the part stays on the moving side and leaves the cavity cleanly. This small check prevents drag marks, whitening, and stuck parts during sampling.
Why does Wall Thickness Matter?
Keep wall thickness as even as the function allows. A common starting range for many thermoplastics is about 1 to 3.5 mm, followed by a resin-specific review. Thick zones cool slowly and can create sink marks; thin zones can restrict filling. Use ribs, bosses, and gussets that support the part while keeping section mass compatible with the cooling cycle.
Where do Radii and Vents Help?
Use internal radii at corners to lower stress and match the cutting path of an end mill. Put vents near the end of melt flow so trapped air can leave. Good venting supports filling and reduces burn marks.
How should You Specify Surface Finish?
Choose the finish that matches function and viewing distance. A polished cavity adds hand work and schedule. A machined or light-texture finish may meet the requirement with a simpler tool. State the finish by area.
How should You Plan Quantity, Materials, and Tool Life?
Quantity planning connects your forecast to mold structure. Review the next 12 to 24 months, order pattern, and finished-goods cost before choosing cavity count or steel grade.
Is a Single-Cavity or Multi-Cavity Mold Better?
A single-cavity mold keeps early tooling and change work easier to control. A multi-cavity mold can lower the piece price when demand is steady, provided geometry and runner balance support even filling.
Family molds can combine related parts for a pilot production run, but each cavity needs its own inspection limits. Ask for a cycle-time and capacity comparison, then select cavities with demand in view.
Which Material Fits a Bridge Production Run?
Select resin by strength, heat, chemicals, color, and regulatory need. PP, ABS, PC, PA, POM, and filled grades differ in shrinkage and cooling. Share the final material early so gate, vent, cooling, and steel decisions match it.
When should You Move to a Hardened Tool?
Move when demand, wear, or dimensional stability justifies the capital. Aluminum tooling can carry early on-demand production and design learning. A hardened steel mold fits a repeat program with higher shot counts, tighter process windows, or long service expectations. Keep the CAD, inspection data, and approved process settings from the first tool so the next tool starts with evidence.
What should You Ask a Supplier Before Ordering?
Your supplier conversation should end with numbers, documents, and named owners. The checklist below helps you compare a quote by total project risk and tooling cost.
Which Questions Clarify the Real Schedule?
Ask for DFM timing, tool build days, first trial date, correction allowance, sample quantity, and the expected injection molding lead time. Confirm who approves material substitutions and how an engineering change affects the quote. A supplier that supports low-volume trial production should also explain how it will scale to small-batch production or bridge production after approval.
Which Records Support a Purchase Decision?
Request the DFM report, mold-flow findings when used, steel and heat-treatment records, CTQ dimensional reports, and the T1/T2 issue list. Ask how cooling, venting, ejection, and wear parts will be checked. These records support tool release.
Where Can Engineering Support Shorten the Route to Production?
For projects that need both rapid tooling and a low-volume injection molding production plan, XINKEY MOULD works from the product-design stage through DFM, mold design, machining, trial molding, and small-batch production. Its engineering workflow covers wall thickness, draft angle, gate and runner balance, flow analysis, cooling, venting, and ejection before tooling starts.
The team also handles sliders, lifters, inserts, threaded cores, and two-shot structures when the part needs them. Multi-stage machining checks and trial-molding verification create a traceable handoff into pilot production. If you need to compare a rapid prototype mold with a production-ready plastic injection mold, share the CAD file, resin, CTQ features, expected quantity, and target date so the quote reflects the actual decision.
FAQ
Q1: What is low-volume injection molding used for?
A: It produces saleable parts for design validation, market testing, replacement demand, and early production before a larger tooling investment.
Q2: How does aluminum tooling affect fast tooling?
A: Aluminum tooling supports quick machining and practical revisions for early runs. Tool life and resin choice still need a project-specific review.
Q3: What information should you send for an injection molding DFM review?
A: Send the 3D CAD file, 2D drawing, resin and color, annual and first-run quantity, CTQ dimensions, finish callouts, and target date.
Q4: How long is the injection molding lead time?
A: It depends on geometry, mold structure, material, inspection needs, and revision rounds. Ask for separate dates for DFM, tool completion, T1 samples, corrections, and shipment.
Q5: When does a multi-cavity mold make sense?
A: It fits steady demand where balanced filling and shared inspection controls can lower the part cost. A single-cavity tool often suits early learning and changing designs.
- 22nd 10 月 2026
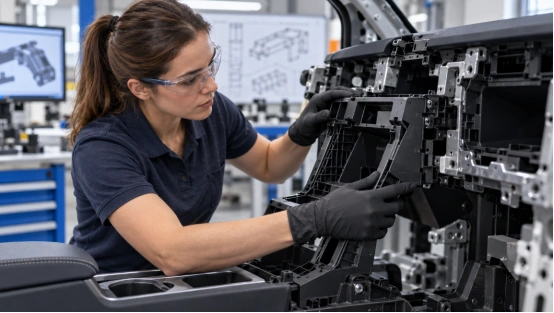
5 Benefits Of Rapid Tooling For Automotive Injection Molding
Car projects frequently shift. This usually happens once an initial physical part goes into a dashboard, console, lamp housing, or battery assembly. Rapid tooling for automotive injection molding offers a quick, manageable route. It takes you directly from CAD data to working parts.
These tools might rely on aluminum or soft steel. The exact metal depends on your target volume and chosen resin. The goal remains highly practical. You get to evaluate the piece and process. Plus, you can verify purchasing choices before paying for an expensive, long-lasting production tool.
What Is Rapid Tooling for Automotive Injection Molding?
It acts as a distinct mold-creation method. It fits automotive prototype production and medium-batch runs perfectly. A basic mold utilizes fewer cavities. It also features a very standard ejection setup.
Conversely, standard production molds require tough hardened steel. They need intricate slides, lifters, and balanced runners. Your final choice relies heavily on volume, geometry, resin, visual requirements, and strict delivery deadlines.
1. Faster Structural Changes Before Steel Commitment
The first physical sample exposes decisions that a screen can hide: a rib may interfere with a connector, a draft angle may hold the part on the wrong side, or a gate mark may land on a visible surface. A rapid prototype mold gives your design team a short feedback loop. You can review T1 samples, record the change, and update the part or mold while the project is still flexible.
How Does the Review Work?
Ask for DFM analysis before machining begins. The review should cover wall thickness, draft, parting line, undercuts, ejection, shrinkage, and the intended press.
The engineering record should also show which change affects tool cost, cycle time, or assembly fit. This makes a quote useful for purchasing because you can compare the cost of a revision with the cost of carrying a risky feature into production.
2. Earlier Validation of Automotive Plastic Parts
Automotive rapid injection molding lets you test structural features with a real molded part. Deep cavities, thin walls, ribs, bosses, and snap fits behave differently under filling, packing, cooling, and ejection. A digital model can guide the review, yet a physical sample still needs fit checks, load checks, surface review, and dimensional measurement.
Where Does Mold Flow Analysis Help?
Mold flow analysis maps gate position, runner balance, filling pattern, weld lines, air traps, shrinkage, and warpage and sink marks before steel is cut. The result is a mold design validation record that points to a specific action, such as moving a gate, changing a rib, adding a vent, or adjusting a cooling circuit.
For complex mold structures, this early work reduces the chance of discovering a slider, lifter, or insert problem during a late trial.
3. Better Control of Prototype Spending
Prototype tooling turns a large tooling decision into staged purchasing. You can order a defined quantity for fit, durability, and user testing, then decide whether the geometry merits a production tool. This fits projects that need low-volume injection molding for a pilot build, a customer trial, or a limited vehicle release.
What Should Purchasing Compare?
Compare the tool price with revision cost, resin usage, inspection time, machine size, and the value of the parts being tested. Ask whether the tool can be modified, whether wear parts are replaceable, and which dimensions will be measured on each sample.
A low entry price loses its value when the tool cannot support the next test or when every change requires a new build. A clear inspection plan also helps engineering, quality, and purchasing agree on the release decision.
4. Shorter Lead Times for Testing and Launch Decisions
Rapid tooling for automotive parts can move first shots into a working press in days or a few weeks, depending on geometry, material, and tool construction. CNC-machined aluminum or soft tooling often suits an early run. The supplier still needs time for design review, machining, assembly, trial molding, and corrections, so a realistic schedule matters more than a headline number.
Which Process Details Affect the Schedule?
Injection molding cycle time depends heavily on wall thickness, resin, mold temperature, and cooling layout. Well-planned mold cooling channels remove heat from thick areas and reduce the wait before ejection. Venting, runner balance, and a stable ejection system also affect the number of trial loops. When you request a quote, ask for milestones for DFM approval, steel release, first trial, dimensional report, and sample shipment.
5. A More Practical Mass Production Transition
Rapid tooling can use production-grade plastics, so the samples can represent the mechanical behavior, appearance, and assembly feel expected from the final part. The tool itself may have a shorter service life than a hardened production mold. That distinction should be written into the sourcing plan.
How Do You Plan the Handover?
Carry the approved CAD revision, resin grade, shrinkage data, gate location, cooling notes, and inspection results into the automotive injection molding tooling package.
A multi-cavity mold may need a new runner balance study and a different press condition. Treat the prototype run as process learning: record fill time, packing, cooling, ejection, and key dimensions. Those records shorten the mass production transition and give the production team a starting process window.
What Should You Look for in a Rapid Tooling Partner?
The practical value of a rapid tool comes from decisions made before cutting steel. XINKEY MOULD uses an engineering-first workflow that starts with DFM analysis and mold flow analysis, then moves through mold design, precision machining, trial molding, and verification.
Its team includes 22 in-house designers, with support for rapid T1 samples, low-volume injection molding, sliders, lifters, inserts, hot or cold runners, and cooling-system design. The automotive workflow includes an IATF-aligned process and PPAP documentation available on request.
For buyers comparing suppliers, the useful question is whether the same team can carry approved changes into production tooling. Its injection mold engineering solutions cover that design-to-sampling handoff and keep the release record tied to the mold revision.
FAQ
Q1: What is rapid tooling for automotive injection molding used for?
A: It produces early automotive plastic parts for fit checks, functional tests, pilot builds, and market or customer review before a long-life production mold is released.
Q2: When should you request DFM analysis?
A: Request DFM analysis before steel machining. Review wall thickness, draft, parting line, gates, ejection, cooling, shrinkage, and press requirements while design changes remain manageable.
Q3: Can rapid tooling support PPAP documentation?
A: The supplier can prepare PPAP documentation when the project quality plan calls for it. Confirm the required records, dimensional reports, material certificates, and process data before the first trial.
Q4: How fast can a rapid prototype mold deliver T1 samples?
A: A simple tool may reach T1 samples in days or a few weeks. Geometry, resin, tool material, cavity count, and the number of trial corrections set the actual schedule.
Q5: Does rapid tooling replace a production mold?
A: It supports prototype and bridge quantities. A hardened production mold is usually required for high shot counts, multi-cavity output, tight process control, and long service life.
- 15th 10 月 2026
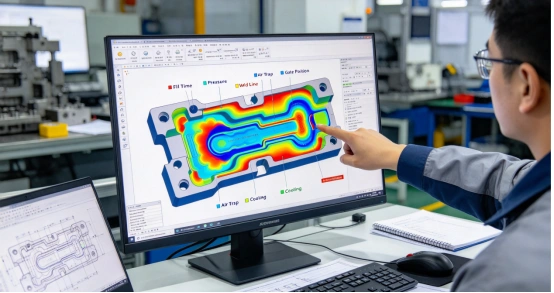
5 Strategic Benefits of Outsourcing Rapid Tooling
A launch date can slip long before the first molded part. The delay often starts with a wall thickness that traps heat, a weak draft angle, or a late gate decision. Outsourcing rapid tooling puts engineering, machining, trial molding, and measured samples on one project path.
A capable tooling supplier connects speed with part quality and a credible route to production through rapid tooling services.
Benefit 1, Shorten Your Time to Market
Rapid tooling compresses the work between a released CAD file and a tested molded part. Engineering review, material planning, mold design, and machine scheduling can start from the same controlled data set.
Run Design and Manufacturing Work in Parallel
An outside team can review draft, wall thickness, undercuts, parting lines, gate position, ejection, and cooling while your product team closes cosmetic details. That overlap may remove several handoffs. It also gives procurement one schedule covering tool design, machining, assembly, trial, inspection, and sample shipment.
Set a Clear Sample Milestone
Ask the supplier to quote a date for T1 samples and list the inputs that control it. Standard tools may reach T1 in two to four weeks. Unscrewing or two-material tools can take four to eight weeks. Complexity, steel choice, bought-in components, and CAD changes still affect time to market.
Benefit 2, Turn Tooling Cost into a Controlled Project Budget
Internal tooling requires design hours, CNC and EDM capacity, assembly skill, press time, metrology, and corrections. Outsourcing places those items inside a defined project scope for comparison against launch volume.
Compare the Full Cost of Ownership
Compare quotations by total project cost. Repeated sampling, steel welding, long cycles, and early wear all add expense. Ask each tooling supplier to state the mold steel, expected life, cavity count, runner type, replaceable wear parts, inspection scope, trial rounds, and change policy.
Match the Tool to Expected Volume
A rapid prototype mold can use a simpler layout and steel suited to design validation or an early market run. A production tool needs balanced cooling, durable sliding parts, controlled hardness, and maintenance access. Share annual volume and likely product revisions before the quote.
Benefit 3, Find Design Risks Before Steel Is Cut
Small CAD choices can create large tool changes. Thin ribs may fill poorly, thick bosses can sink, limited draft can mark the surface, and an undercut may require a slider or lifter. Early engineering review gives you time to change the part file while the change is still simple.
Review the Part through DFM
A useful DFM analysis marks wall thickness, draft, shutoffs, parting lines, ejection points, tolerances, surface requirements, and assembly interfaces. It should also explain why each item matters.
For example, keeping a concentric bore on one mold half reduces mold-shift and tolerance-stack risk. A purchasing team can then approve the tool scope with visible technical reasons.
Test Flow, Cooling, and Warpage Digitally
Mold flow analysis can compare gate positions, pressure, weld lines, air traps, shrinkage, cooling, and warpage before machining. Moving a gate 5 mm in a simulation is a short task. A change after steel cutting can require welding, machining, polishing, and another trial.
Benefit 4, Validate Materials with Production-Like Parts
A printed prototype answers fit and appearance questions. It rarely reproduces resin flow, fiber orientation, shrinkage, weld lines, sink, or ejection behavior from molding. Rapid injection molding gives you parts made with the intended resin and a process close to the planned production method.
Test the Resin in the Intended Process
Use molded samples to compare candidate resins for stiffness, impact, heat, chemical exposure, sealing, color, and surface finish. Process details matter. Phenolic materials, for example, require controlled mold heat and effective venting. Insert-molded parts need secure insert location under injection pressure. Two-material parts need a sound bonding interface and accurate tool alignment.
Use Measured Samples for Decisions
Define the sample plan before the tool trial. Record resin grade, drying condition, melt and mold temperatures, pressure, cycle time, and cavity number. Then inspect critical dimensions and run the product tests that decide release.
A nice-looking sample can still hide a weak process window. Measured evidence gives engineering and purchasing the same basis for approval.
Benefit 5, Create a Practical Bridge to Mass Production
The first acceptable shot proves that the tool can make a part. Pilot runs test repeatability across cavities, shifts, and material lots. Outsourcing rapid tooling delivers the planned value when one team carries the project through sampling and early production.
Stabilize the Process during Pilot Runs
Low-volume production and bridge production let you supply launch units while the team checks cycle time, scrap, dimensional drift, assembly fit, packaging, and maintenance needs. Engineers can tune cooling, venting, packing, and ejection with direct access to the tool. That continuity matters when a defect appears only after a longer run.
Protect Return on Tooling Investment
Earlier sales help recover the tool investment, though repeatable output drives the larger return. Review yield, labor content, resin use, cycle time, press tonnage, and wear-part access. A parting-line choice that lowers projected area may allow a smaller press. A hot runner may cut runner waste at high volume. Each decision should connect to your forecast and unit-cost target.
What Should You Expect from an Engineering-Led Tooling Partner?
The five benefits depend on one connected engineering record from DFM through trial molding. XINKEY MOULD assigns 22 in-house designers to product review, mold design, and mold flow analysis. Its documented process covers wall thickness, draft, parting lines, sliders, lifters, cooling, venting, ejection, and material selection before machining. High-precision CNC work reaches ±0.01 mm-level control, and molding equipment spans 90T to 750T for sampling and production handoff.
For a buyer, the useful point is continuity. The same project can move from a 24-hour DFM report to tooling, T1 inspection, pilot quantities, and injection mold manufacturing. That structure makes design changes, sample findings, and production settings easier to trace. You can request a project review with the CAD file, resin, annual volume, finish, tolerance, and target sample date.
FAQ
Q1: When Should You Outsource Rapid Tooling?
A: Outsource when your launch plan needs molded parts sooner than your internal engineering, machining, or press capacity allows. It also suits projects that need DFM, material trials, or a direct path into pilot production.
Q2: What Files Should You Send for a Rapid Tooling Quote?
A: Send a 3D CAD file, a dimensioned drawing, resin grade, surface requirements, critical tolerances, annual volume, target tool life, and the required T1 date. Add assembly data when mating parts control fit.
Q3: How Can You Compare Tooling Quotes Fairly?
A: Compare steel, cavities, runner system, mold standard, expected life, inspection scope, trial rounds, sample quantity, change terms, lead time, and shipping. A line-by-line comparison reveals what each price includes.
Q4: Can Rapid Tooling Use Production Resin?
A: Yes. A suitable mold can run production resin for functional, dimensional, and assembly tests. Confirm drying, processing temperature, shrinkage allowance, and any fiber or flame-retardant content before tool design.
Q5: Can a Rapid Tool Move into Mass Production?
A: Some tools can support continued production when their steel, cooling, cavity layout, wear parts, and press interface match the volume target. Ask the supplier to state the expected shot life and maintenance plan in the quote.
- 16th 10 月 2026
The Strategic Advantages of Short-Run Injection Molding for Complex NPI
Complex new product introduction (NPI) projects rarely fail because the CAD model looks wrong. They fail when a part reaches steel, trial molding exposes a gate or cooling issue, and the schedule has no room for another tooling loop.
Short-run injection molding gives you production-like parts early. You can check fit, function, finish, assembly, and customer response before a full-volume tool absorbs the budget.
What Does Short-Run Injection Molding Add to NPI?
Short-run injection molding uses a production-intent mold and a controlled quantity of parts for design validation, pilot production, or bridge production. The run can be sized around a test plan, such as 100 parts for assembly checks or several thousand parts for a market release. Molded parts and process data provide the evidence for the next tooling decision.
A Physical Test of the Product
Resin shrinkage, weld lines, ejection marks, and actual assembly loads appear in molded parts. A printed model cannot show how a thin wall fills or how a snap fit behaves after cooling. Early molded samples let your team record dimensional data and make a change while the tool remains practical to modify.
A Bridge Between Design and Volume
Bridge production gives you sellable or field-test units while the final multi-cavity tool is being completed. This matters for a new medical accessory, smart device housing, or industrial enclosure with a fixed launch date. The same material family, gate concept, and process window can carry the project into the next tool stage.
Which NPI Risks Can You Control before Full-Volume Tooling?
The largest NPI costs often come from late engineering decisions. A short run creates a checkpoint for the decisions that affect tooling cost, yield, and delivery.
Part Design and DFM Analysis
Start with DFM analysis before cutting steel. Review wall thickness, draft angles, ribs, bosses, undercuts, parting lines, and the projected area that drives press tonnage. A small change to a rib or draft can remove a difficult slide, simplify machining, and reduce a later mold revision.
Flow, Cooling, and Ejection
Moldflow analysis can compare gate positions, runner balance, filling patterns, air traps, and weld lines. Cooling channel layout matters because cooling often occupies about 70% of an injection cycle.
Uneven thermal balance creates sink marks and warpage. Venting gives trapped gas a path out, while a balanced ejector pin, sleeve, lifter, or air-ejection system protects cosmetic surfaces during release.
Complex Geometry and Tolerance
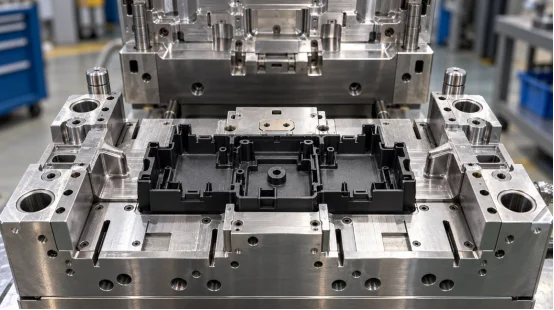
Sliders, lifters, inserts, threaded cores, and two-shot features add movement and tolerance stack-up. A short-run tool lets you inspect those interfaces under real pressure. Check core and cavity alignment, guide pins, runner balance, and the fit of mating features before you commit to a larger cavity count.
How Should You Compare Short-Run Tooling Cost with Production Tooling?
Price the decision across the whole NPI path. A low quote becomes expensive when it creates extra sampling, hand rework, scrap, or a rebuild. A practical sourcing review should include tool steel, machining, trial molding, material waste, engineering time, freight, and the cost of a delayed launch.
Use Volume and Risk Together
Choose a cavity count that matches the validation need. A single-cavity or low-cavity mold can provide fast feedback for a complex enclosure. A multi-cavity tool makes sense after dimensions, resin, and assembly have settled. For high-cycle projects, steel selection and heat treatment affect wear parts, maintenance, and stable output.
Set Acceptance Data Before the Run
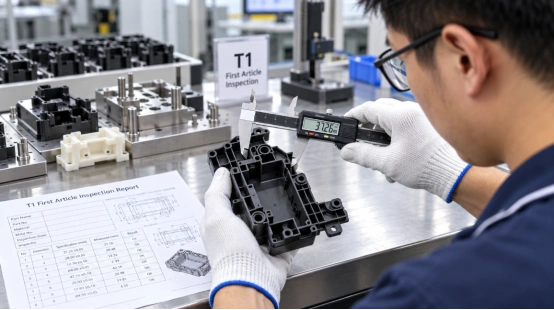
Define critical dimensions, cosmetic zones, cycle time, part weight, flash limits, and assembly tests before ordering. Ask for T1 samples, a measurement report, and a short list of open issues. This gives procurement a clear release gate and gives engineering facts for the next tool decision.
What Does a Reliable Short-Run Process Look Like?
The process should connect design review, mold design, machining, trial molding, pilot production, and mass production. Each handoff needs an owner and a measurable output.
A Practical Sequence
Share the 3D data, resin, annual volume, key dimensions, and launch date.
Complete DFM analysis and review Moldflow findings with the design team.
Select the parting line, runner, cooling, venting, ejection, and mold steel.
Machine and assemble the tool, then run T0 or T1 samples.
Measure parts, test assemblies, and record process settings.
Correct the tool or part design, then release a controlled pilot production run.
This sequence keeps the evidence close to the decision. It also makes a handoff to a higher-cavity tool easier because the team has a record of what worked.
How Can an Engineering-Led Supplier Support Complex NPI?
XINKEY MOULD supports short-run injection molding as part of an injection mold engineering workflow. The team starts with DFM analysis, wall thickness and draft review, and Moldflow analysis before tooling. It then connects precision CNC machining, EDM, mold assembly, trial molding, and low-volume production support.
For complex NPI, the useful detail is the handoff: T1 samples are checked against design intent, cooling and venting are reviewed against defects, and slider, lifter, insert, or threaded-core behavior is tested before a volume decision.
The process also covers rapid prototype mold development, pilot production, and bridge production, so procurement can compare a tool plan with a real launch schedule. See the injection mold engineering solutions and custom injection mold products pages for the relevant service scope.
FAQ
Q1: When should you choose short-run injection molding for NPI?
A: Choose it when fit, function, finish, assembly, or market timing needs evidence from production-intent parts before full-volume tooling.
Q2: Can low-volume injection molding use the final production resin?
A: Yes. Use the approved resin grade when the tool, press, and process window support it, then record material lot and drying conditions with the samples.
Q3: How do T1 samples help a procurement decision?
A: T1 samples connect the quoted tool design with measured dimensions, defects, cycle data, and open engineering actions, giving procurement a clear release gate.
Q4: Does a complex injection mold require Moldflow analysis?
A: Moldflow analysis is useful when gates, thin walls, multiple cavities, cooling balance, air traps, or weld lines create meaningful process risk.
Q5: What should you request before pilot production?
A: Request an approved drawing, resin specification, dimensional report, cosmetic standard, process settings, open-issue list, and a correction plan with owners and dates.
- 9th 10 月2026
原型注塑成型 vs 3D 打印 vs CNC 加工
选择原型制作工艺取决于您需要零件解答的问题。例如,用于装配检查的外壳、卡扣式盖子和十件试生产所需的证据各不相同。本指南从交付周期、材料性能、精度、表面光洁度、数量和采购风险等方面对原型注塑成型、3D 打印和 CNC 加工进行了比较。
每种塑料原型制作方法都能生产出什么样的产品?
这三种方法制造零件的方式各不相同,因此零件所承载的证据也各不相同。注塑成型是将熔融的热塑性塑料注入型腔,并重复相同的循环。3D 打印是逐层添加材料。CNC 加工是从实心块体上去除材料。您的预期用途应该决定哪种方式最为重要。
原型注塑成型
原型注塑成型使用小批量模具(通常为铝或较软的工具钢)来制造计划生产所需的树脂零件。您可以检查成型零件的熔接线、缩痕、翘曲、卡扣力以及表面纹理。
3D打印
3D打印适用于日常几何形状的改变或一到五个快速零件的打印。FDM技术可使用ABS、PLA和聚碳酸酯等材料;树脂和粉末系统则可实现更精细的细节。层方向会影响强度、阶梯状纹理和热响应。使用相同标称聚合物的3D打印铰链的弯曲性能可能与注塑成型的铰链不同。
数控加工
CNC加工从ABS、POM、尼龙、PC或其他工程塑料块上切割零件。它能提供清晰的基准面和精确的尺寸,尤其适用于易于加工的特征。内部通道、深腔和薄肋会增加成本,因为刀具需要操作空间和支撑。加工后的零件还会保留塑料块的纹理和刀痕,这可能与模压成型的纹理有所不同。
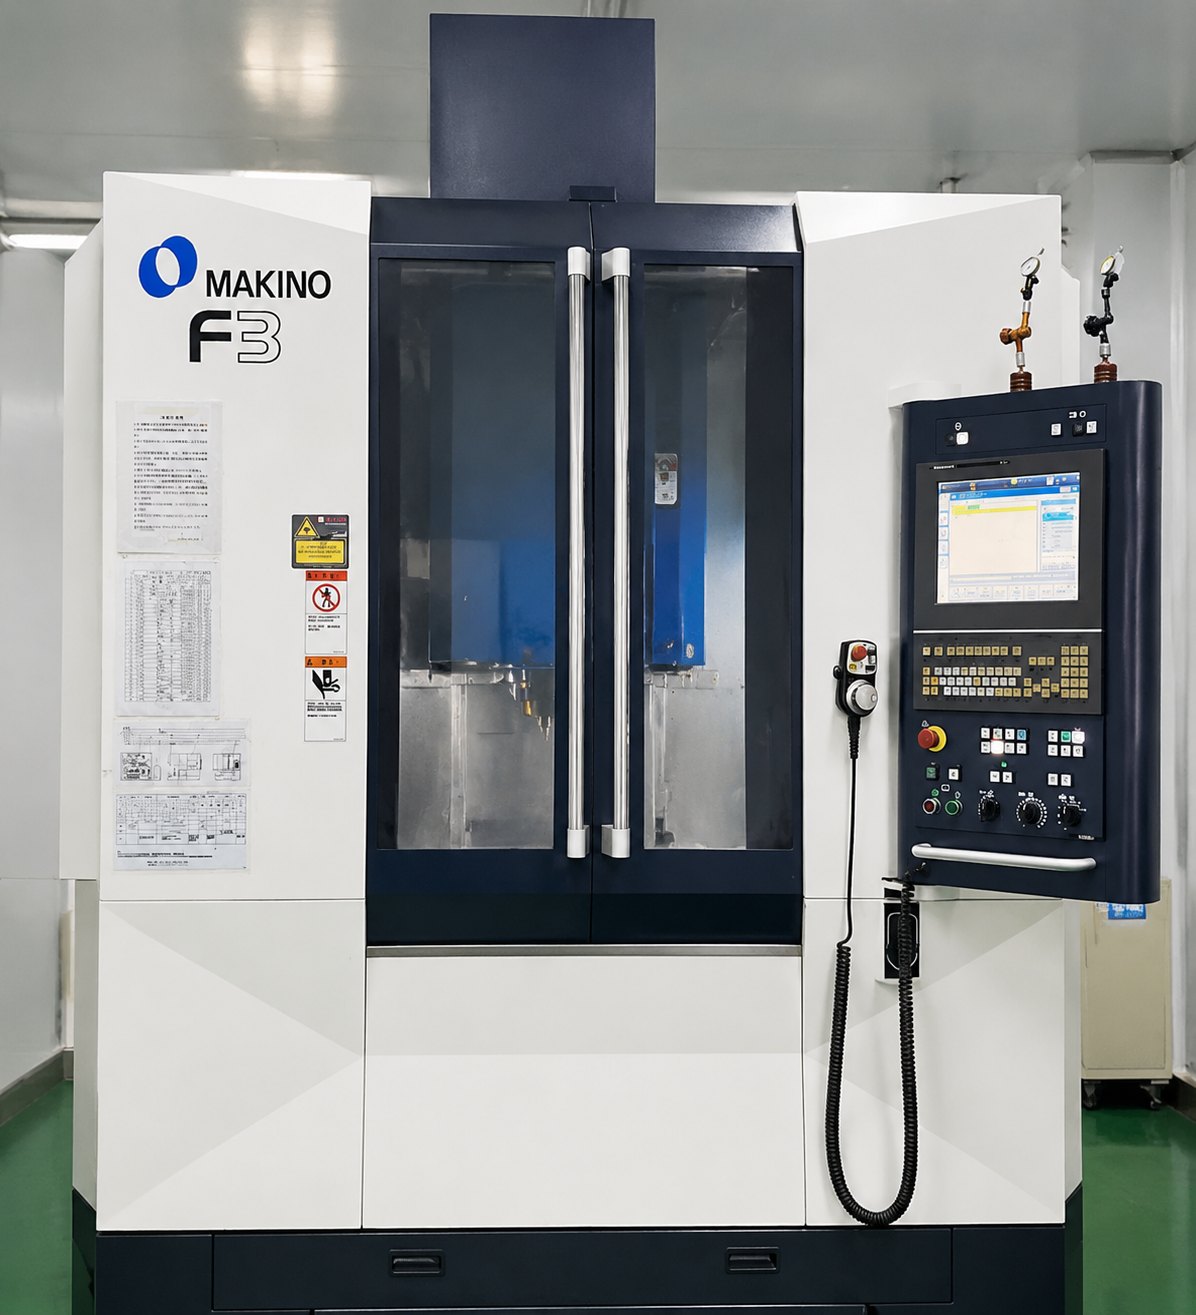
图片:数控铣床主轴雕刻白色塑料原型零件.webp
哪种方法最适合您的数量和交货时间?
数量会影响成本曲线。在比较报价之前,请设定目标数量、样品日期和设计修改次数。
一至十部分
3D打印适合早期形状检查,因为无需专用模具。CNC加工适合需要精确孔径、平面基准或功能性螺纹的零件。当决策涉及模塑件的性能时,例如活动铰链或夹子,注塑成型原型则更为合适。
十到几百份
小批量注塑成型可以将模具成本分摊到可重复生产的零件上,并支持使用生产级材料。过渡模具可以在准备更长寿命模具的同时提供试制件或可销售的成品。CNC加工适用于厚重、刚性零件;3D打印则增加了去除支撑、打磨或定向检测等功能。
进度计划
文件准备和排程完成后即可开始3D打印。CNC加工时间取决于编程、材料、夹具和表面处理。标准的快速模具项目大约需要两到四周才能完成T1样品;滑块、嵌件、拆卸系统、特殊钢材或高要求的表面处理可能会将制作周期延长至四到八周。请与供应商确认各个阶段的里程碑。
材料和零件性能对比如何?
材料的选择应根据使用条件而定,例如冲击、高温、化学品腐蚀、弯曲、外观或电绝缘性能。使用替代树脂会导致关键性能问题无法解决。
生产级树脂证据
注塑成型工艺可让您在可控的条件下测试ABS外壳、PC冲击部件、PP活动铰链、PA填充部件以及各种填充型材料。树脂干燥、熔体温度、保压压力和冷却都会影响收缩率和翘曲度。PP具有耐化学性和柔韧性;填充型PA可增加刚度,但会增加模具磨损。
印刷和机械加工材料的限制
打印部件可能存在空隙、层间接缝或强度不均匀等问题。CNC加工部件使用预制材料,但切割过程可能会暴露应力或导致薄壁变形。对于热老化、化学腐蚀或重复组装等情况,测试样品应与最终使用的树脂和工艺相匹配。
哪种方法能获得合适的精度和表面光洁度?
精度取决于每个特征的具体情况。基准策略、收缩率、工具使用、检测方法和热历史都会对其产生影响。
准确性和细节
CNC加工能够对可加工的表面和孔保持严格的公差,因此非常适用于量规和配合研究。数字化构建直接形成复杂形状,最终打印件保留了构建表面;模具分型线并不决定其几何形状。
小孔和边缘可能需要后处理。注塑成型工艺稳定后,型腔几何形状会重复出现;DFM(面向制造的设计)评审必须考虑拔模斜度、分型线、浇口、顶出和树脂收缩等因素。
表面处理和外观
机加工表面会留下刀痕,可以进行抛光或纹理处理。印刷表面通常需要打磨或蒸汽处理。模腔在每次注塑成型后都能保持特定的抛光或纹理效果。浇口痕迹、熔接线、顶出痕迹和光泽度差异都应在图纸上标明,尤其是在外露部件上。
购买对比中应该包含哪些内容?
有用的报价将价格和时间与明确的范围挂钩。比较工程量、材料、检验、修改、交付方式和单价。
报价清单
请提供三维模型、带尺寸标注的二维图纸、树脂牌号、颜色、表面处理、数量、年度预测、关键公差、装配环境以及所需的样品日期。请询问模具材料、型腔数量、流道类型、模具寿命目标、试模、T1报告、纠错政策以及所有权条款。
对于数控加工,请列出原材料、基准方案、检测点和表面处理工艺。对于印刷,请具体说明工艺流程、方向、层高、后处理工艺和受力方向。
DFM 和审判记录
面向制造的设计 (DFM) 和 DFM 分析应在金属切削前标记壁厚、拔模斜度、加强筋、凸台、倒扣、浇口、排气孔和顶出等问题。在 T0 和 T1 阶段,记录短射、飞边、烧焦、缩痕、熔接线、粘连、翘曲和尺寸偏差。将每个问题与相应的操作和负责人关联起来。该记录为采购部门批准下一模具或修改零件提供了明确的依据。
工程合作伙伴如何将原型结果与生产联系起来?
当原型机暴露出模具或工艺问题时,交接环节至关重要。设计逻辑应贯穿整个评审过程,包括模具修正、试模以及小批量生产决策。
XINKEY MOULD 将此工作流程应用于塑料零件开发。其工程师在模具制造前会审查壁厚、拔模斜度、收缩率、浇口、流道、冷却、排气、顶出和模具强度。对于侧孔、螺纹或双材料特征,其范围包括滑块、顶杆、镶件、螺纹型芯、自动脱模装置和 2K 双色注塑结构。CNC、EDM 和线切割等加工方式支持模具制造,加工控制精度可达 ±0.01 mm(在特征和检测方法允许的情况下)。
作为一家塑料注塑模具制造商,它将试验结果应用于模具修正和小批量注塑成型,并将样品数据与生产联系起来。
常问问题
问题1:对于20个零件来说,原型注塑成型值得吗?
是的,如果您严格要求使用生产级树脂、模压成型的夹子、铰链或特定纹理。只需权衡一下工具的前期成本与自行加工或打印每个零件的成本即可。还要考虑您对可靠、稳定的性能有多看重。
Q2:3D打印可以取代注塑成型原型吗?
只能说部分如此。3D打印在处理基本形状、间隙和早期人体工程学检查方面表现相当不错。然而,注塑成型则展现了截然不同的细节。它能精确地展示型腔填充过程,突出真实的收缩和潜在的熔接线。此外,它还能演示实际的脱模过程和树脂的真实性能。
Q3:何时才是CNC加工的实用选择?
当您只需要少量刚性零件,且对基准面、孔或螺纹的精度要求极高时,它就能发挥出色作用。对于体积较大的几何体,它也是明智之选。打印厚截面耗时过长。此外,小批量生产也无法抵消定制模具的成本。
Q4:最终塑料材料用于哪个工艺?
注塑成型通常使用预先设计好的树脂。数控加工依赖于标准工程塑料坯料。而3D打印则仅限于适用于特定打印机的聚合物。因此,在得出任何最终性能结论之前,务必核实热性能、化学性能和强度规格。
Q5:何时应该从原型模具过渡到生产模具?
只有在设计完全稳定后才能进行过渡。您的 T1 样品也必须通过所有基本验收标准。此外,您的预计产量必须足以支持购买寿命更长的模具。请根据原型运行的可靠数据做出明智的选择,这些数据包括:记录的周期时间、实际废品率、实际维护需求和已验证的单位成本。
- 2026年10月2日
快速原型注塑成型:塑料零件开发实用指南
CAD模型看起来可能已经完成,但注塑成型的零件仍然存在一些问题。加强筋会下陷吗?卡扣能经受住组装吗?外壳会围绕按钮变形吗?快速原型注塑成型技术使用预先设计的树脂制造出实际的注塑零件,从而解答这些问题。
该方法适用于需要进行功能测试、试生产、客户样品或早期销售样机的塑料零件开发。速度优势在于:在金属切削开始之前,就已明确了刀具的选择范围并完成了必要的工程设计工作。
什么是快速注塑成型?
快速注塑成型使用快速制造的模具来生产可重复的塑料零件。许多团队也称之为原型注塑成型或快速模具制造。该工艺遵循与生产成型相同的基本流程:夹紧、注射、保压、冷却、开模和脱模。
它与生产工具的区别
注塑模具原型通常使用铝、P20、NAK80 或更硬的嵌件来制作耐磨部件。数量、树脂、表面光洁度和公差是选择嵌件的关键因素。铝材适用于小批量生产。P20 便于焊接和设计修改,而 NAK80 则适用于抛光表面。
生产工具可能包含多个型腔、硬化钢材、热流道、自动化操作和可更换的易损件。快速模具可确保成型过程与当前测试目标保持一致。
何时应该使用快速模具?
当打印或机械加工的原型无法解答下一个工程问题时,应使用快速模具。模塑树脂在焊缝、活动铰链、卡扣配合、凸台和纹理壁等部位的性能会有所不同。
功能验证和试运行
使用生产级材料测试刚度、耐化学性、热响应或装配力。ABS 适用于坚固的外壳,PC 适用于抗冲击或透明部件,PP 适用于活动铰链,PA 适用于承载重物的组件。填充 PA 和耐高温等级的 PA 会快速磨损软性模具。
小批量注塑成型适用于试生产和小批量产品发布。过渡模具可在模具长期使用期间提供可销售的产品,并为买家提供可衡量的周期、废品和检验数据。
开发流程是如何运作的?
一个有效的流程始于零件需求。共享3D模型、2D图纸、树脂等级、颜色、表面处理、数量、关键尺寸和装配环境。标记密封面和外观区域。诸如“所有地方公差要求严格”之类的模糊说明会增加成本并留下争议空间。
模具设计前进行可制造性设计
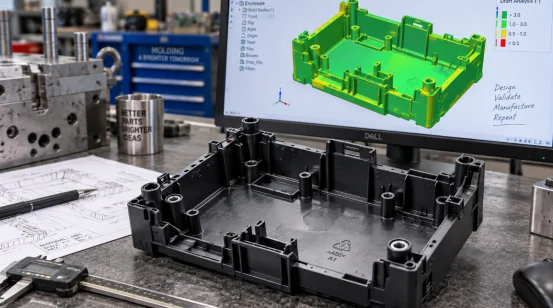
可制造性设计 (DFM) 检查壁厚、拔模斜度、倒扣、加强筋、凸台、分型线、浇口、排气孔和顶出。DFM 分析还应识别跨越分型线的尺寸以及需要滑块、升降器、嵌件、套筒或旋出机构的特征。
壁厚约为 1.5 至 2.5 毫米的部件适用于许多常见的热塑性塑料,但树脂供应商的产品范围和部件的功能是首要考虑因素。相邻壁的厚度应尽量接近。较厚的凸台底座冷却速度较慢,可能会导致对面出现明显的凹陷。拔模斜度有助于部件脱模;纹理表面通常比抛光表面需要更大的拔模斜度。
流动模拟可以测试浇口、流道平衡、熔接线、气穴、压力和热行为。它适用于薄壁、长流道、多腔模具和外观零件。每项发现都应指导相应的改进措施,例如移动浇口或修改冷却通道。
工具构建、试用和修正
CNC加工可形成大多数型芯和型腔。电火花加工可处理深槽、锋利的内部细节以及刀具无法精确加工的几何形状。线切割、研磨、装配和抛光等工序则可完成工具的最终加工。
T0 检查填充、开启、顶出和安全操作。团队记录短射、飞边、烧焦、缩痕、熔接线、翘曲、粘连和尺寸偏差。T1 样品应包含约定的树脂、工艺记录、尺寸报告和剩余步骤。即使是来自不稳定循环的漂亮样品,也仍然是未完成的结果。车间经常会吸取这样的教训。
哪些设计选择决定了零件质量?
零件质量取决于一系列相互关联的决策。浇口位置影响熔接线和包装。冷却影响循环时间和翘曲。顶出影响拖痕、泛白和变形。
闸门、冷却、排气和喷射
将浇口设置在熔体能够以可控压力填充型腔并压实较厚区域的位置。在多型腔模具中,平衡的流道至关重要,因为一个型腔过早填充会分散另一个型腔的压力。流道末端的排气孔可以排出滞留的空气,减少烧伤。
冷却通常占据注塑成型周期的大部分时间。型芯和型腔周围的冷却层需要均匀覆盖。局部过热会导致部分区域保持柔软,而邻近区域的塑料收缩,这可能导致脱模后扁平外壳发生扭曲。因此,顶针、顶套、脱料板、顶杆或气动顶出装置需要足够的接触面积,才能在不造成凹陷的情况下移动零件。
下单前应该检查哪些内容?
按范围比较报价。最低的模具费用报价意义不大,因为报价范围可能很广。mits树脂、试验、检验、变更或预期工具寿命。
实用采购清单
请各注塑模具制造商详细说明模具材料、硬度、型腔数量、流道类型、模具寿命、包含的试模次数、T1交货期、尺寸报告、维护计划和所有权条款。确认注塑机吨位和注射量。较大的注塑面积需要足够的锁模力来控制飞边。
比较不同数量的零件成本。冷流道适用于许多小批量生产,但每次注塑都会产生流道材料。热流道可以减少浪费,并可能缩短生产周期,但模具和维护成本更高。产量和树脂价格是选择流道的关键因素。
首次试模后,预留一次修正循环的时间。标准快速模具大约需要两到四周才能达到 T1 阶段。复杂的螺纹拆卸、嵌件或双材料结构可能需要四到八周。几何形状、钢材供应、表面处理和检验范围都可能导致交付日期变更,因此制定里程碑计划比一次性交付承诺更有用。
将原型结果转化为生产决策
试验报告应将每项缺陷与具体操作和责任人关联起来。这样的记录能将快速检测工具转化为切实可行的生产关卡。
XINKEY MOULD 通过早期可制造性设计 (DFM)、模流分析、快速原型模具开发、试模和过渡生产,为这一阶段提供支持。其工程范围涵盖滑块、顶杆、镶件、螺纹型芯、冷热流道、平衡顶出以及冷却布局,适用于需要比简单开合式模具更复杂功能的零件。精密加工包括数控加工 (CNC)、电火花加工 (EDM) 和线切割,加工控制精度可达 +/-0.01 毫米,具体取决于特征和检测方法。
团队可以将试验结果应用于模具修正和小批量零件生产,从而确保设计反馈、模具变更和工艺记录之间的关联性。对于采购方而言,这种连续性使得T1评审更易于审核,并为生产模具决策提供更可靠的成本和质量依据。
常问问题
问题1:快速原型模具生产T1样品的速度能有多快?
答:标准工具大约需要两到四周才能达到T1标准。滑块、旋出系统、嵌件、双材料结构、特殊钢材或要求高的表面处理可能会将工期延长至四到八周。
Q2:快速注塑模具一次可以生产多少个零件?
答:模具寿命取决于模具材料、树脂、压力、温度、几何形状和维护情况。报价前请确定所需的注塑次数,以便模具制造商选择合适的钢材并保护高磨损区域。
Q3:可以使用最终生产用的树脂吗?
答:是的,在很多项目中都是如此。使用指定的树脂能更好地检验其贴合性、强度、收缩率、热响应和表面质量。对于磨蚀性、腐蚀性或耐高温等级的树脂,可能需要使用钢制嵌件或钢制工具。
Q4:询价时需要发送哪些文件?
A:请提供 3D 模型、带尺寸标注的 2D 图纸、树脂等级、颜色、表面处理、数量、年度预测、关键公差、装配细节以及所需的样品日期。
Q5:何时应该过渡到生产模具?
答:当设计稳定、试验符合验收标准且预测产量支持使用长寿命模具时,即可考虑推进。决策时应参考原型运行中测得的周期时间、废品率、维护需求和单位成本。



联系我们